If you are using GoDaddy, this article will help you to configure your domain to point to GravityCerts. This step is required in order to go live with your website with GravityCerts. These steps are similar with most domain providers, however the interface and menu items may vary differently with other domain hosts.
CNAME:
gravitycerts.hosting.kinsta.cloud
A Record:162.159.134.42
Below, are 2 options available to set your domain settings to point to GravityCerts:
Option 1 (Preferred): Point nameservers to Cloudflare, then point Cloudflare to GravityCerts
- If your site is migrated internally with GravityCerts, your DNS will not need to be changed.
- Cloudflare will manage your DNS records and GoDaddy will remain as your domain name registrar.
- Cloudflare offers additional site security, speed, and caching. Create free Cloudflare Account
Option 2 (Alternate): Point “A Record” to GravityCerts from Godaddy
- Keeps your Domain and DNS management at GoDaddy.
- You will need to manually update your DNS records if your website is ever migrated to a new server within GravityCerts. We will notify you that your domain settings will need to be changed prior to migrating servers.
Option 1 (Preferred): Point nameservers to Cloudflare, then point Cloudflare to GravityCerts
Cloudflare is a service that helps manage your DNS for free with flexible record configuration types.
Until you point your nameservers to Cloudflare, no changes you make here impact your live site. We’ll walk you through setting up your records in Cloudflare before pointing nameservers, so the transition is smooth.
- Open a new tab and navigate to www.cloudflare.com
- Sign up for a free (or paid) account to get started
- Enter your domain name when prompted
- Cloudflare will automatically look up your DNS records and import them from GoDaddy
- Delete the one existing A record for your domain
- The record name will be your apex domain (domain without www)
- Or, the record may show a name field value of the symbol
@

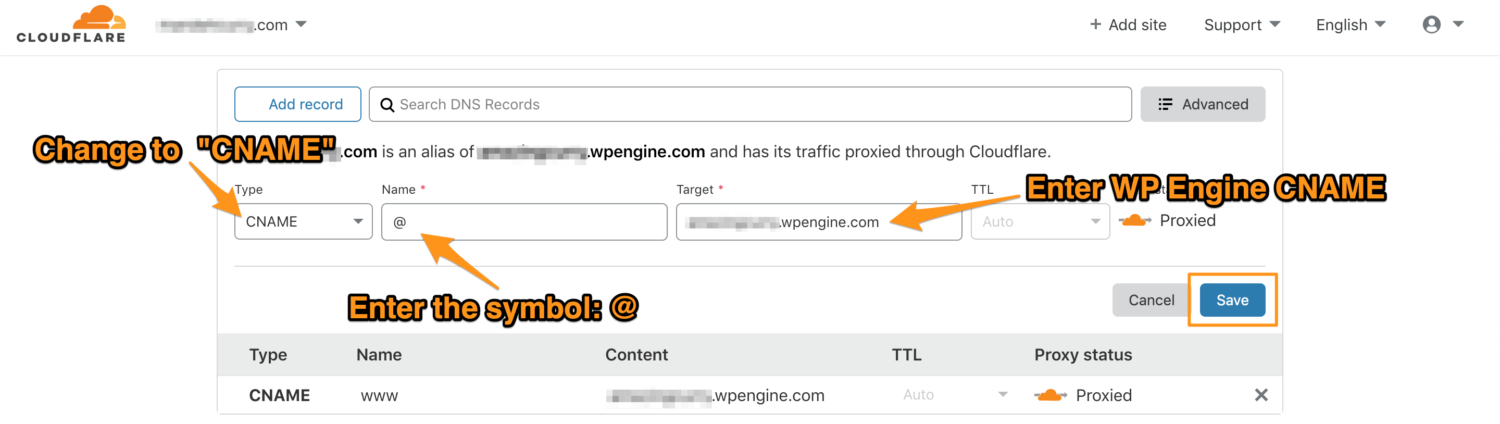
- Locate and click Add Record
- Change the Type dropdown to CNAME
- In the Name field enter the symbol:
@ - In the Target field enter the CNAME Record: gravitycerts.hosting.kinsta.cloud
- Click Save
Review the list of records again, locate the Name column and identify the row for www. This row will look like one of the two following options:
- If the www record is a CNAME record type, no further changes are needed at the moment and you can proceed to updating your nameservers. It will look like this:
- If the www record is an A record type and looks like this:
- Delete the single existing www record
- Click the button to Add Record
- Change the type to CNAME
- In the Name field enter:
www - In the Target field enter your GravityCerts CNAME Record: gravitycerts.hosting.kinsta.cloud


Update Nameservers in GoDaddy
-
- Cloudflare will show you two nameservers to change
- You may need to scroll down a bit on the DNS page to locate the Nameserver section
- Leave this tab open so you can easily copy them!
- Switch back to the tab where GoDaddy was opened previously
- Locate section for Nameservers in GoDaddy
- Click Change
- Select the option Enter my own nameservers
- Copy and paste the two nameservers from Cloudflare into the fields on GoDaddy
- Click Save. You may need to wait a few minutes for the changes to propagate before moving to the next step.
- Return to Cloudflare, then click Continue
- Cloudflare will show you two nameservers to change
The nameserver settings may take some time to change over. As they do, the Cloudflare settings will take effect, automatically pointing your DNS to GravityCerts with the CNAME record we configured earlier.
Option 2 (Alternate): Point “A Record” to GravityCerts from Godaddy
If you don’t want to use Cloudflare for DNS, its ok. You can still configure your DNS settings right through GoDaddy’s dashboard.
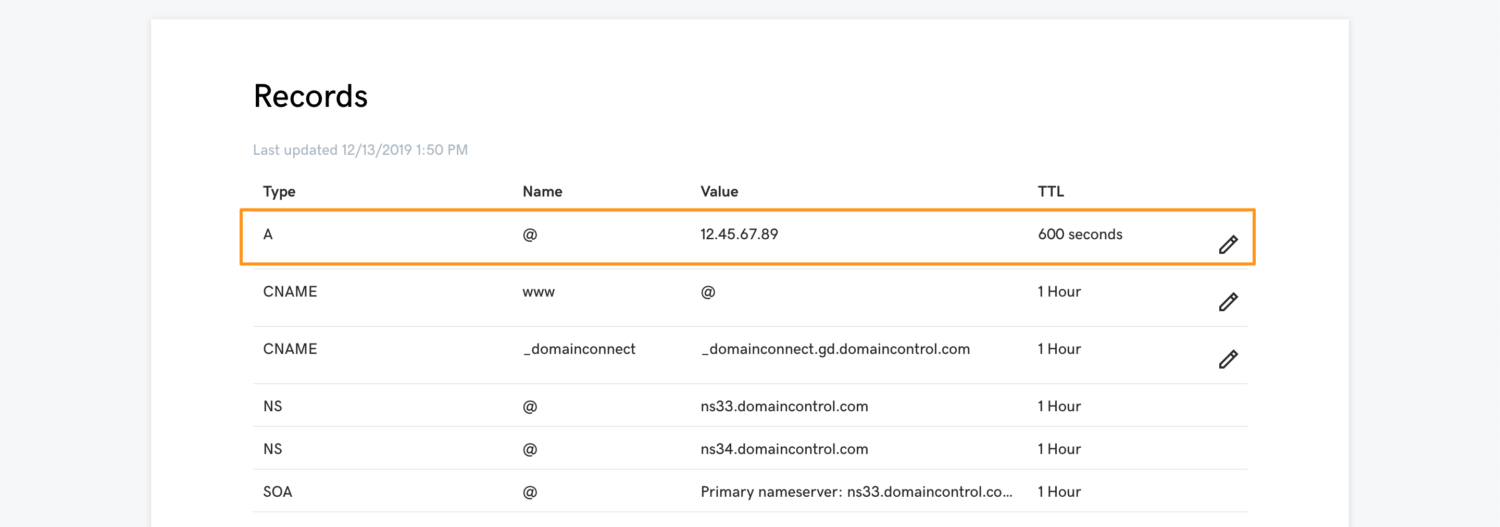
- Open the DNS page within GoDaddy
- Locate the A record for your primary domain
- The name will be
@ - Or, the name field will show your domain
- The name will be
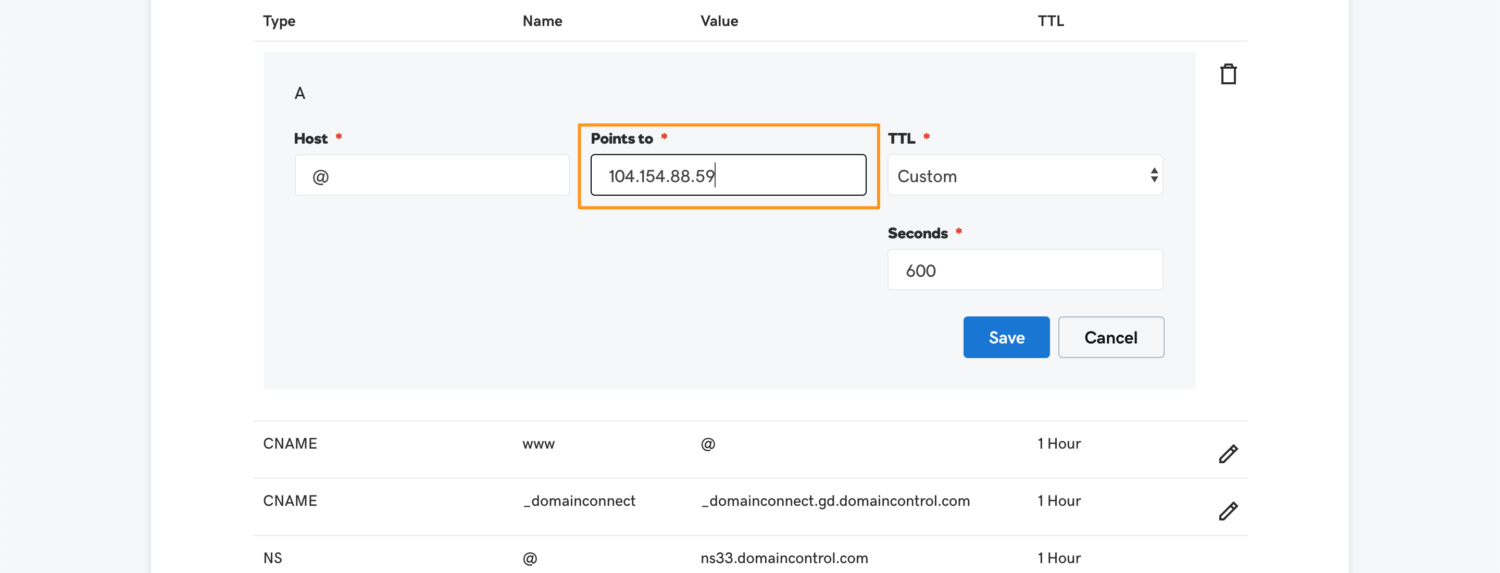
- Click the pencil icon to the far right of this record to edit
- Locate the field Points to
- Update this field to your GravityCerts “A Record” value of 162.159.134.42
- Click Save
- Review the list of records again, locate the Name column and identify the row for www. This row will look like one of the two following options:
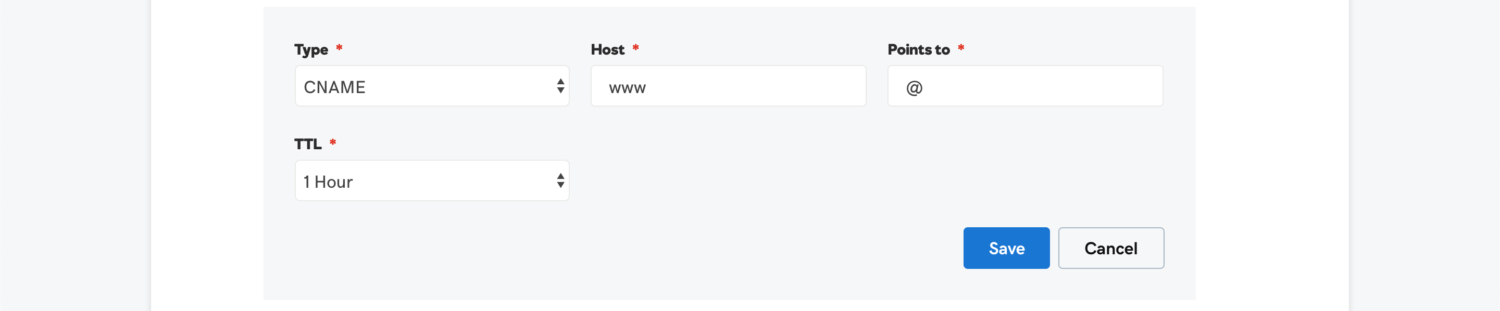
- If the www record is a CNAME record type, no further changes are needed. It will look like this:
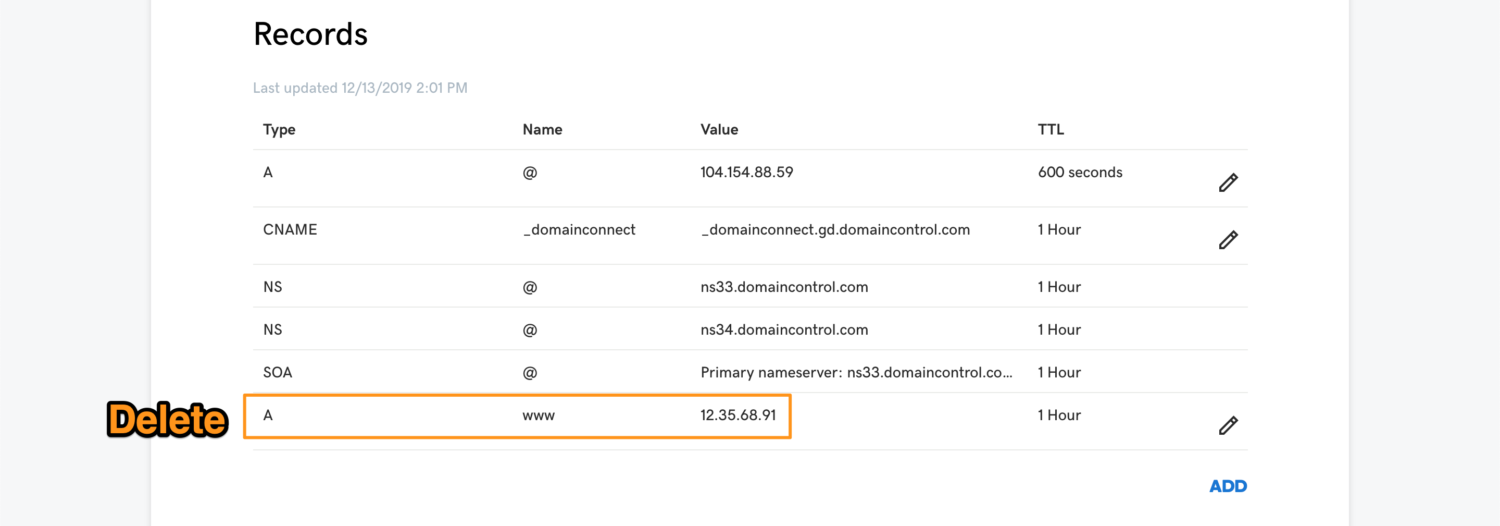
- Delete the single existing www record
- Click the button to Add
- Change the dropdown for type to CNAME
- In the Host field enter:
www - In the Point to field enter:
@ - Click Save
- If the www record is a CNAME record type, no further changes are needed. It will look like this:
That’s it! Now you just need to wait for GoDaddy to propagate these changes.
If you need additional help, please let us know. Make sure to provide your Godaddy, and Cloudflare username/password so we can log into your account to make the necessary changes.