This video demonstrates how to set up your GravityCerts plugin and map your form fields in your Nowcerts account. If you would rather read the instructions keep reading below.
Download and activate your plugin
After completing your purchase, download, then upload your plugin into your WordPress site. If you need assistance, please see this helpful article on How to Install a Plugin.
Configure your plugin settings
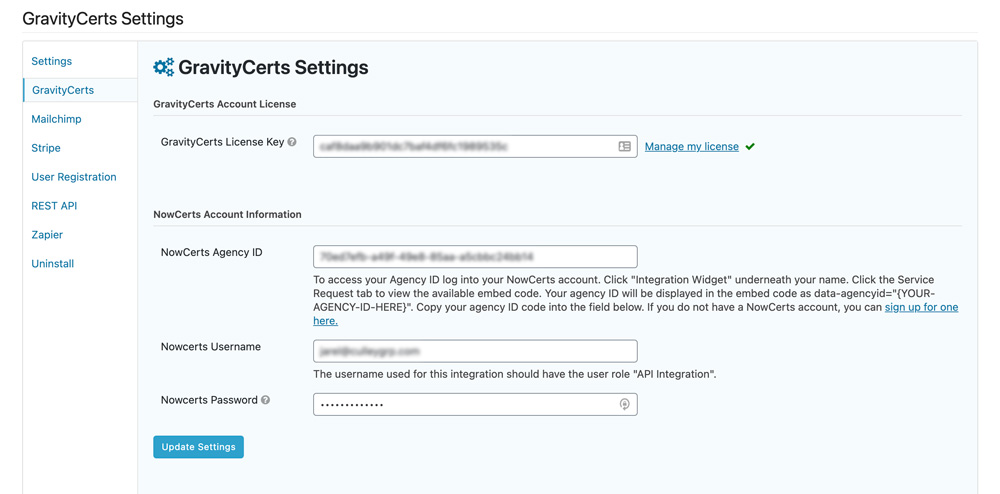
Navigate to Forms > Settings > GravityCerts to view the main setting page for your plugin. You will see form fields to enter your GravityCerts license key, Nowcerts Agency ID, and Nowcerts username and password. Once you enter the information in these fields and Save, you plugin is ready for use.
Sending a form to Nowcerts
Next, click Forms to view your main forms list admin page. While moving your mouse over a form you will see a Setting link. Hover over Settings then click GravityCerts in the sub-menu. You will need to do the following steps below for each form that will send data to your Nowcerts AMS.

- Click Add New to create a new feed.
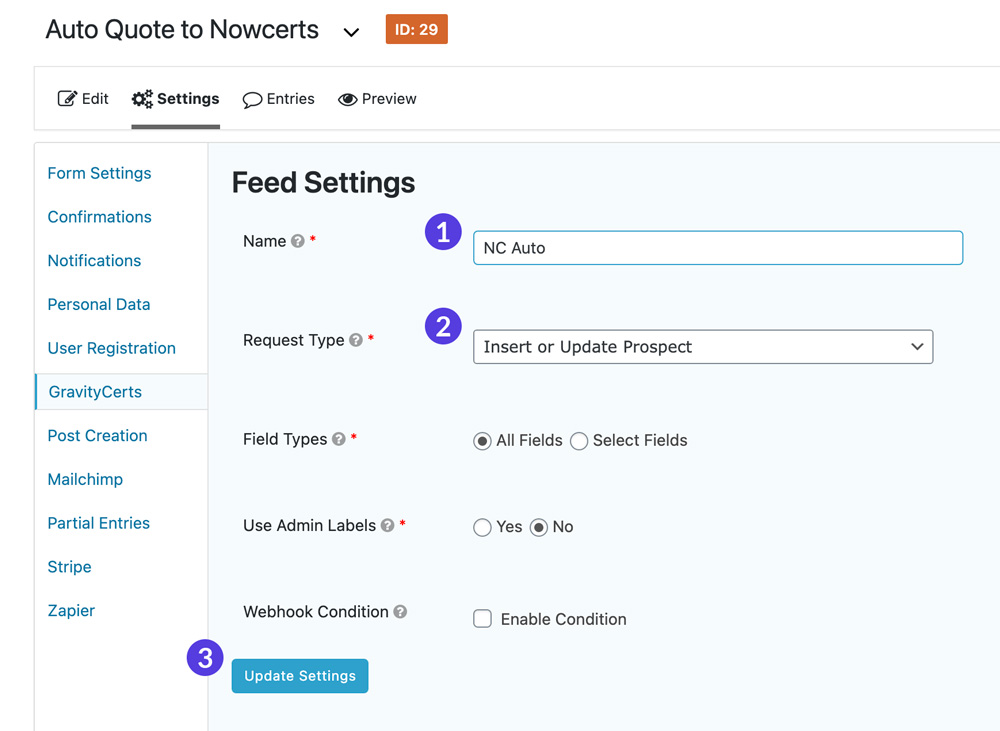
- Give your feed a name. Something short works best.
- Choose how you want to send your data into Nowcerts from the Request Type. For quote forms you will most likely want to select “Insert or Update Prospect“. This option will send all form data into Nowcerts.
- Click Save.
That’s it!
Your forms will now be sending all your form data into your Nowcerts account, even if you add additional fields later to your form.
Map submitted form fields in Nowcerts
To best map your fields in you Nowcerts account, you should submit a test form on your website, making sure to fill out every field so you only need to map the fields once.
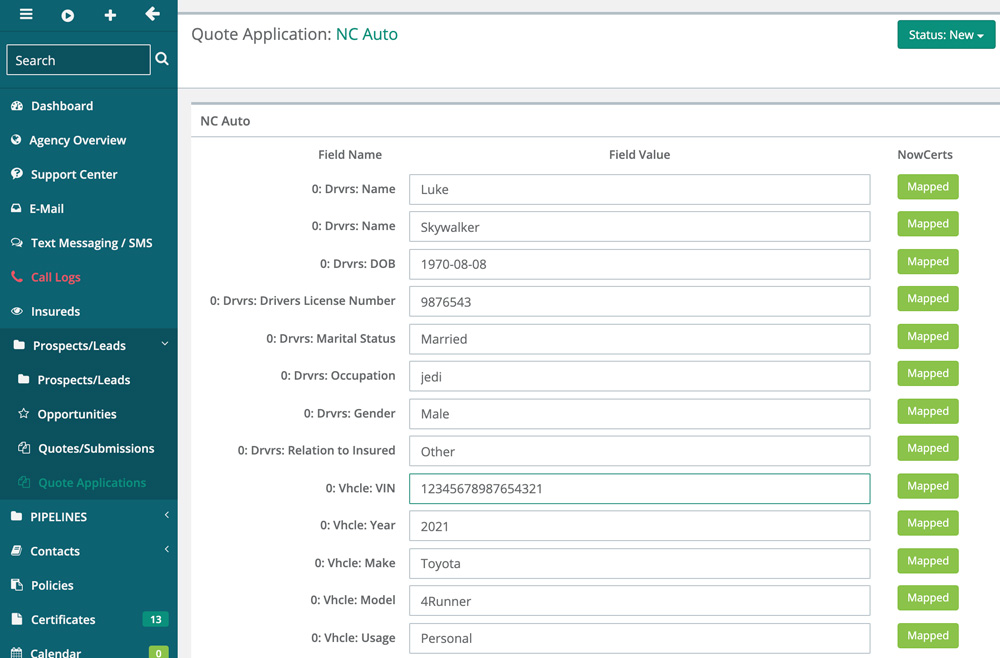
- Log into your Nowcerts account, then navigate to Prospects/Leads > Quote Applications.
- Click the green Edit icon to edit your test submission you just created.
- Click the green Map button to the right of each field to map that form field entry into a field in Nowcerts. This is the same process as mapping fields to PDFs. If you are adding drivers, vehicles, or properties make sure to increment your submissions in the number field in the mapping dialog box. The video above demonstrates how to do this.
- Once all fields are mapped click Save and Merge.
Your prospect is now created in Nowcerts with all your data mapped.
You can also create Custom Fields in Nowcerts to store any additional information you want to collect from your forms. These custom fields will be available when mapping your fields above, and will be available when mapping your PDF applications.
Now enjoy client data flowing smoothly from your website, into your AMS, then onto your PDF forms, all without having to enter data manually.