GravityCerts enables you to connect your Canopy Connect account with Gravity Forms to populate form fields with client data pulled by Canopy Connect, directly from the insurance carrier. Connecting your Canopy Connect account is easy and only takes 4 bits of information to get started.
What You’ll Need
You will need these 4 bits of information from Canopy Connect.
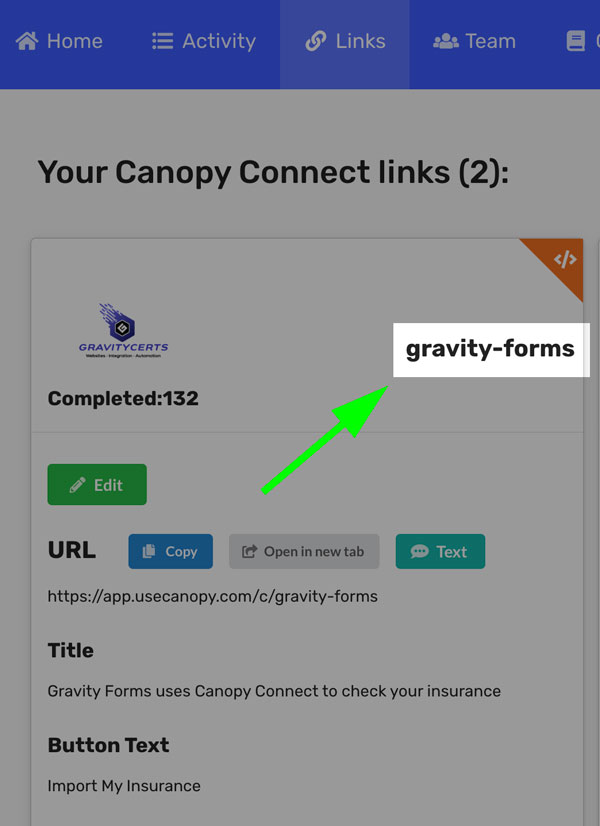
1. Alias
Click Links in your Canopy Dashboard, then copy your Canopy Alias.
My example says “gravity-forms”. Yours will say something different. Typically the name of your agency.
2. Team ID
Click your name in the upper right corner, then click Settings.
Then click Copy next to your Team ID.

3. API Key & Secret Key
Scroll down and click + Add a Production API Key
Copy your API Client ID and API Client Secret. (Note: This is the only time you will be able to view the client secret, so be sure to copy it!)
Then click Done.

Paste the info above into the GravityCerts settings
These setting are located in your WordPress admin area under Forms > Settings, then GravityCerts.

Populate Form Fields
This next section will show you how to populate form fields with data pulled from Canopy Connect.
Examples:
- Pre-fill primary insured’s information such as email, phone, address, date of birth, gender, etc.
- Pre-fill driver information
- Pre-fill vehicle information
Choose a form to edit. Once the Canopy Connect fields above have been entered, a new Field Group will be added to the edit form page titled GravityCerts Fields. A new form field block titled Canopy Connect is available.
Place this field in the form where you want the Import Your Insurance button to appear. For ease of use for prospects, this is typically placed toward the top of the form. That way they can import their insurance first and only fill any remaining fields.
Use the Canopy Connect Value dropdown field to populate each form field by clicking on a form field. The option is in the field’s General tab, after the Description field.


Tips
Addresses
Mailing Address and Physical Address have options for each portion of the address, the Full Address, and state names both abbreviated and spelled out.
An Address block can simply use the Full Address option. GravityCerts will correctly separate the address into each form field.
Names
When using the Name block choose option Name (First + Last). This option will correctly populate the first and last name into the correct fields.
Adding More Vehicles & Drivers
By default GravityCerts provides option to pre-fill form field for 2 drivers and 2 vehicles. To increase this limit, visit the Canopy Connect settings and increase the Prefill Options: Max Vehicles and Prefill Options: Max Drivers to your desired limit. Max is 20 for each option.

Response Information
Some client information returns specific information such as Gender: Male, Female, Nonbinary. If you’re using a dropdown field for any of the client info below, make sure the options match what is listed here.
Address Nature:
MAILING, PHYSICAL, LIENHOLDER
Gender:
MALE, FEMALE, NONBINARY
Marital Status:
SINGLE, MARRIED, DIVORCED, WIDOWED
Policy Type:
AUTO, BOAT, CONDO, FARMOWNER, FLOOD, HOMEOWNERS, LANDLORD, LIFE, MOTORCYCLE, TERM_LIFE, UNIVERSAL_LIFE, WHOLE_LIFE, RENTERS, SNOWMOBILE, UMBRELLA, RECREATIONAL_VEHICLE, FIRE, TRAILER, PERSONAL_ARTICLES, EARTHQUAKE, BUSINESS_OWNERS, COMMERCIAL_UMBRELLA, COMMERCIAL_AUTO, COMMERCIAL_FIRE, COMB
Status:
ACTIVE, CANCELLED, EXPIRED, UNVERIFIED, PENDING_ACTIVATION, PENDING_CANCELLATION